Installing Snort on Ubuntu might sound complex, but the truth is, to install Snort in Ubuntu is easy and can be done with just a few clear steps. Snort is an open-source IDS and IPS tool developed by Martin Roesch in 1998.
It currently has two versions: Snort 2 and Snort 3. Snort 3, an upgraded version of Snort, features a redesigned design and improved effectiveness, performance, scalability, and extensibility. Snort is available in cross-platform: Linux and Windows.
The below guide will help to install & configure Snort on Ubuntu.
Prerequisites
- Basic understanding of what Snort is (check our intro guide)
- Internet Connection
- Ubuntu Operating System (Physical/Virtual Machine)
- Enable Hypervisor (if using virtual machine)
- Apache server running on Ubuntu
- SSH server running on Ubuntu
Steps To Install Snort
Step 1: Update the repository
sudo apt-get update
By updating the repository, all package will be updated to newer version.
Step 2: Install Snort
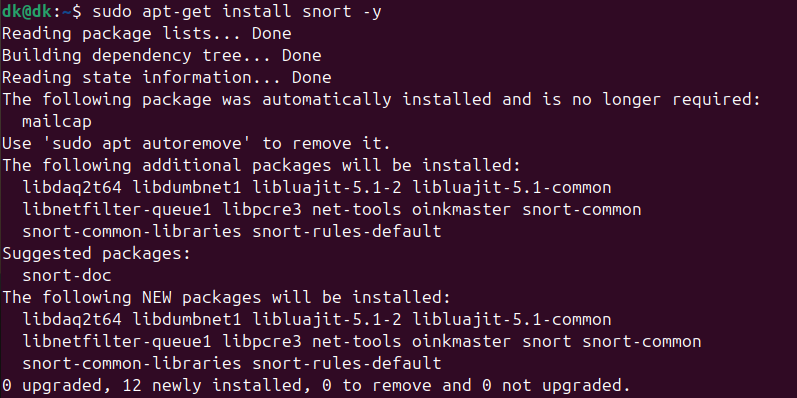
sudo apt-get install snort -y
While installing the tool, we will get a terminal message about the snort configuration.
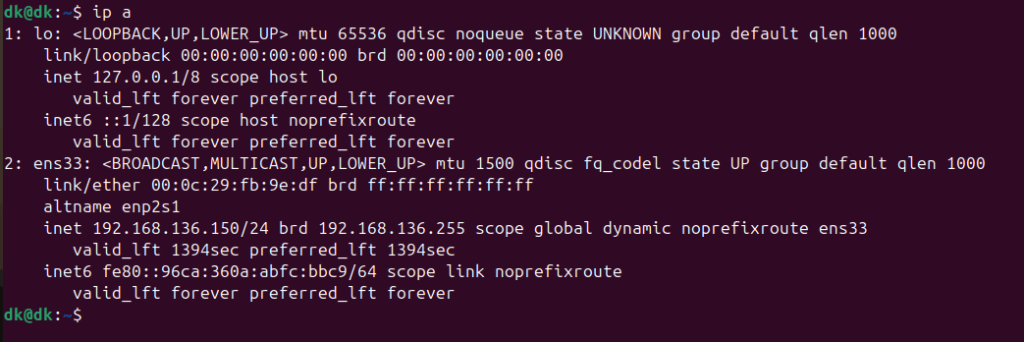
After running the following command, enter the address range interface in the Snort configuration section to specify which IP range should be scanned in the local Snort network.
ip a
Snort will then ask us to determine $HOME_NET. In this post, we are utilizing Snort as a Host-Based IDS, so we need to provide the IP address of the Ubuntu system.
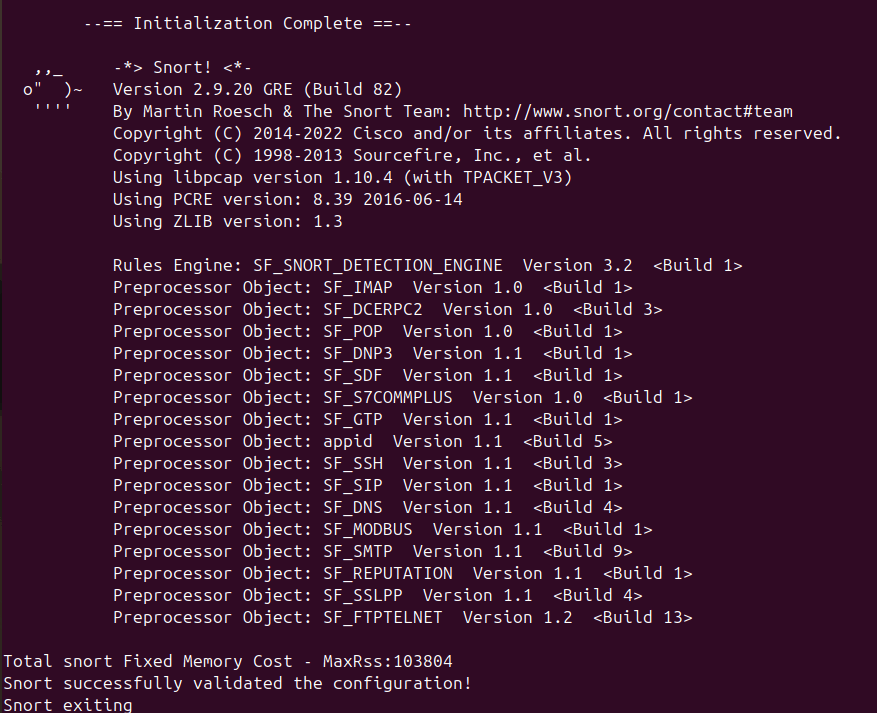
Step 3: Let’s check the version of snort.
snort -V
Steps To Configure Snort
The Snort configuration file, which determines how snort operates, is by default in the /etc/snort directory.
- Configure Network Variables
Since Snort is a host-based intrusion detection system, we should use an editor of our choosing to enter the IP address of the Ubuntu machine as a $HOME_NET variable. The /etc/snort/snort.conf file will be configured using Mousepad as an editor.
sudo mousepad /etc/snort/snort.confThen, change the $HOME_NET as following:
- Examining Rule Path and Rule Files
The $RULE_PATH variable in the snort.conf file determines the location of the snort rule files.
/etc/snort/rules/local.rules files contain custom snort rules. When writing Snort rules, this file will be used.
There are some community rules with categories included with the Snort installation.
- Configure Output Files
We may utilize various approaches to producing log files and checking alerts for rule-matching traffic patterns. In this post, we’ll write the logs to CSV and PCAP files.
To produce log files in CSV format, add the following line to the “Configure output plugins” section of the snort.conf file.
Output alert_csv: /var/log/snort/alert.csv (by default)
To produce log files in PCAP format, add the following line to the “Configure output plugins” section of the snort.conf file.
Output log_tcpdump: /var/log/snort/tcpdump.log
- Test the Configuration File
We may test our settings with the following command. If we make any errors in the configuration file, the corresponding command will return an error.
sudo snort -T -c /etc/snort/snort.conf
The testing of the configuration file is successful!
Wrapping Up
Installing Snort on Ubuntu involves a few simple steps: upgrading the system, installing essential dependencies, downloading Snort and its rules, and correctly configuring it.
By following these steps, users can create a strong intrusion detection and prevention system to help safeguard their network. Once deployed, Snort can be tweaked and tuned to meet individual security requirements, making it invaluable for both personal and business network defense.


